Bust-a-Brown Banner

When I first started to tie flies I went to a local fly shop to buy materials. The hottest new fly was a soft hackle developed by the local fly shop owner. After arriving at the shop I browsed through all the feathers, threads, tails and various synthetic materials. Not knowing what to buy or what to tie I asked the owner if he could help. We discussed several patterns and more options; finally I decided to tie that hot new soft hackle. I went out the door that day with a small bag and a lighter wallet, but I couldn’t wait to get home and tie my first real soft hackle.

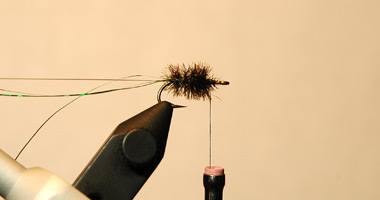
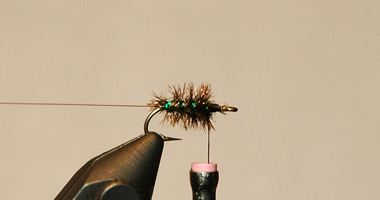
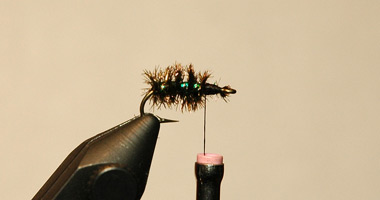
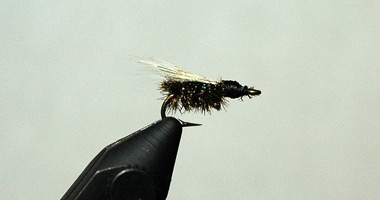
I spread the hackle, thread and the hooks on the desk, poured a glass of red wine and started my first try at that soft hackle. Throughout the next hour I managed to destroy several hackles and a hook or two. The hackles and the wine, plus my rookie tying status just weren’t working when it came to that pattern. The hackle was my biggest problem and needed to be replaced with something easier on my large fingers. There was a squirrel’s tail lying out and I clipped a stack of fur from the middle of the tail tail.  The squirrel wasn’t going to need it anyway. The fur from that tail was neatly stacked on top of the body of the new soft hackle/streamer. For good measure I tied up three more that appeared somewhat the same. With that glass of wine finished I went to bed.

The next day I was standing knee deep in the Elk River in Middle Tennessee with three friends. The TWRA had stocked the river with fresh browns that week and those browns were on the rise everywhere we looked. I tied on that new fly and started picking up brown trout. My friends were catching fish too, but it seemed to be my day to catch fish on my new fly.  

Before the day was over a couple friends also had those flies and the flies produced fish for them as well. The fly still needed a name and this was just the right group to help with the name. We discussed several name options as we ate our celebratory Snickers Bars. It was decided the soft hackle/streamer had to be a brown trout fly and the way the browns were busting it all day we needed to name it the Bust-a-Brown. So, the name Bust-a-Brown was born that day on the ride home.

David is a guide living in Middle Tennessee. He offers float fishing trips on the Caney Fork and Elk Rivers.
Visit David's Website

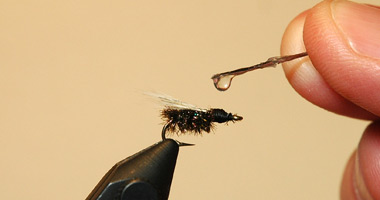
Photography by Anthony Williams


Materials and Tools  

Bust-a-Brown Materials:

Hook: Mustad 3366 size 12-16
Thread: Uni-Thread Black 6/0
Body: Green Flashabou over Peacock eye
Rib: Small Copper Ultra Wire
Fin: Squirrel’s tail
Cement: Dave’s Flexament

Photograph Step 1

Step One- Tie the thread starting one eye length back from the base of the eye. Tie just past the bend of the hook, and come back even with the base of the barb. Then come forward half way to the point of the hook.

Photograph Step 2

Step Two- Lay the wire on the back side of the hook away from you and tie thread forward. This will give the fly a wider profile. Stop just before the front of the thread.


Photograph Step 3

Step Three- Take three strands of Flashabou and tie the strands from front to back.

Photograph Step 4

Step Four- Cut two strands of peacock eye and lay them on top of the hook. Tie the peacock eye from the rear of the fly to the front; again stop just before the front of the thread. Now your thread should be toward the front of the fly. (All the materials should be hanging from the rear of the fly.

Photograph Step 5

Step Five- Wrap the peacock eye strands from the rear to the front and capture the peacock strands with a couple wraps of thread.

Photograph Step 6

Step Six- Wrap the three strands of Flashabou from the rear to the front, leaving spaces between wraps for the peacock eye to peek through. This gives the body of the fly a little action as it moves through the water. Capture the Flashabou with a couple wraps of thread.

Photograph Step 7

Step Seven- Wrap the wire over the Flashabou to the front of the fly. This will give increase the life of the fly and add just a little weight to help the fly break through the surface of the water.  Capture the wire with a couple wraps of thread and I like to give the fly a whip finish here.

Photograph Step 8  

Step Eight- Cut a small clump of hair from the squirrel tail; lay it on top of the fly at the front. Capture it and secure it tightly with multiple wraps of thread. Whip finish a couple of times here as well, the clip the thread.

Photograph Step 9


Step Nine- Add a liberal drop of Flexament to create the head of the fly and let dry.


Please also check out our main website www.littleriveroutfitters.com for daily fishing reports, message board and online catalog.
Email Newsletter icon, E-mail Newsletter icon, Email List icon, E-mail List icon Sign up for our Email Newsletter
For Email Marketing you can trust