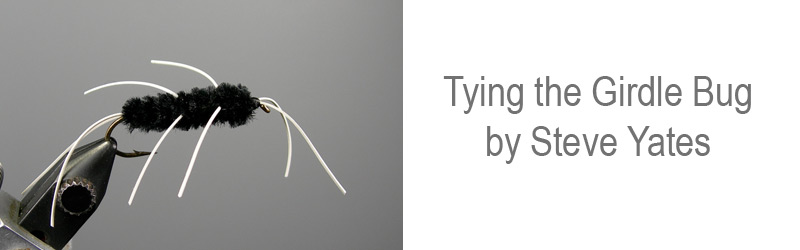
Tying the Girdle Bug by Steve Yates

The Rubber legged girdle bug is one of Montana's legendary trout flies. Like so many flies I prefer these days, this version is simple to tie, and is very durable. It was designed to imitate large stonefly nymphs, hellgrammites, and craneflies. It was thought to have been first used by the local anglers on the Big Hole River. Lost in the murky currents of time however is the original name of the girdle bug.

Back in the 1930s and '40s, it was called the "McGinnis rubberlegs," after its creator, Frank McGinnis of Anaconda. The McGinnis clan plied the waters of the Big Hole often enough to call it their "family river." And Frank McGinnis' homely pattern gained fame far and wide for fooling the river's renowned lunker rainbows and browns.

It is a large and heavily weighted nymph designed to be fished by tumbling it along the stream bottom. It can be tied in a variety of colors but the black chenille body and white rubber legs are thought to be the original dressing. I like to fish this fly on a short, stout leader with additional weight added to the leader as needed to get  it down along the stream bed. Its size makes it a tempting meal during this time of year when trout are less actively feeding. The appeal of rubber leg nymphs should not be overlooked. I tie many of my standard patterns using them. A slight pumping of the rod to exacerbate the movement of the rubber legs as the nymph dead drifts along the bottom can on occasion entice strikes from even the most lethargic fish. 

Hook: Mustad 79580 sz 6
Thread: Uni 6/0 Black 
Weight: .025 lead wire
Tail: White med rubber legs
Body: Black med  chenille
Legs: White med rubber legs
Antennae: White med rubber legs


Step 1 


Step 1- Lay a thread base on the hook shank. Wrap the lead wire in close touching wraps around the hook shank. Start the wire at a point on the hook shank just above the hook point and wrap  forward to about  2 eye lengths behind the hook eye.  Most of the time I like to start my material at a point on the hook shank just above the hook barb, but by starting the wire a little forward on this patten it allows me to make a smooth transition from the material that will be tied in for the tail and body to the lead wraps. 


Step 2 


Step 2- Build a small thread dam in front of and behind the lead wraps. Cover the lead wraps with several turns of thread. This will help keep the lead in place. Add a couple of drops of head cement or your favorite quick drying adhesive.


Step 3 


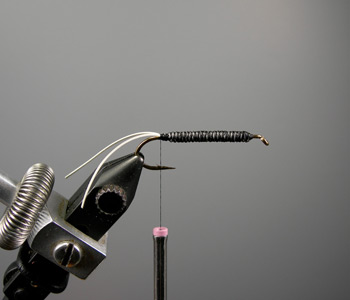
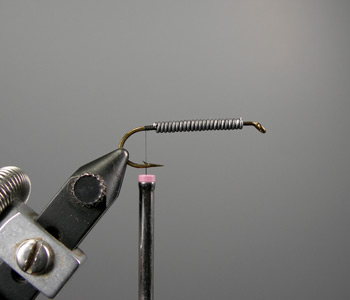
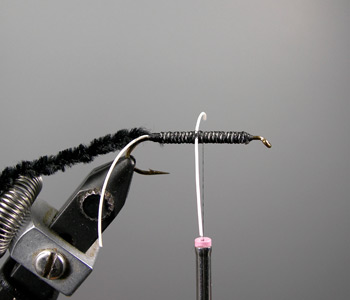
Step 3- Tie in a single strand of rubber leg material behind the lead wraps for the tail. I like to double the piece of rubber leg around my thread and slide it down the thread into place.  The length of the tail and legs should be about a hook shank length on this fly.


Step 4 


Step 4- Prepare the chenille for tie-in by removing the outer layer of material, leaving just the core inner fibers. This will reduce the bulk at the tie-in point and give you a nice smooth body.


Step 5 


Step 5- Advance your thread to the half way point on the hook shank and tie in a piece of rubber leg material on top of and across the shank. Make several crossing wraps to secure the legs.


Step 6 


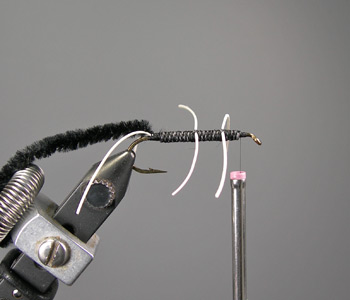
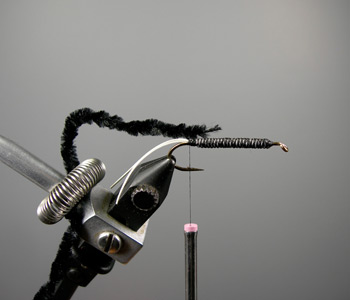
Step 6- Advance your thread half  the distance between the first set of legs and the hook eye and tie in a second set of legs using the same technique as the first set. I like to trim the rubber legs and tail about a shank length now. It makes wrapping the chenille easier.


Step 7 


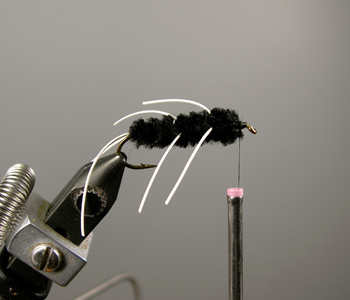
Step 7- Wrap the chenille body, be careful not to trap the legs or tail.


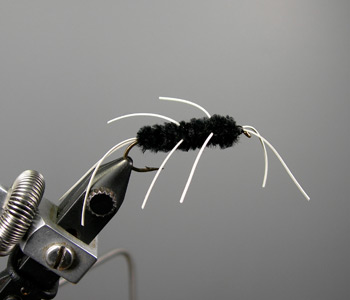
Step 8- Add one more piece of rubber leg material for the antennae. Again, just like the tail, I like to double the material over my thread and slide it down the thread into place.  Make a few wraps between the rubber leg material to separate it and insure that you don't close off any of the hook eye. 

Questions or comments are always welcome syates6006@gmail.com


Please also check out our main website www.littleriveroutfitters.com for daily fishing reports, message board and online catalog.
Email Newsletter icon, E-mail Newsletter icon, Email List icon, E-mail List icon Sign up for our Email Newsletter
For Email Marketing you can trust