Tying the October X Caddis by Steve Yates Hook: Daiichi 1180 size 10 The arrival of the October Caddis is another one of those fall events that puts a smile on the faces of most fishermen. It is anticipated by some fishermen almost as much as the turning leaf colors and cooler air and water temperatures. The Great Brown Sedges or October Caddis belong the genus Pycnopsyche. Size wise they are the largest caddis that hatch in our waters that I know of. Their size and availability along with the lack of other insect hatches this time of year make them a favorite of trout. Trout this time of year are trying to eat everything they can before the onset of winter. Craig Matthews’ X Caddis is an easy to tie low riding pattern that is especially effective on clear, slow moving water where trout can become selective. It can be tied in a variety of colors to match many different types of caddis. Its low profile is perfect for the low water conditions of late summer and fall. The X Caddis represents a crippled caddis that has not successfully emerged from the pupal case. Since caddis normally emerge quickly and do not linger on the surface like mayflies the only adults that are readily available to trout are cripples that aren’t going anywhere, or spent adults during the egg laying process. The X Caddis does a good job of imitating both life stages.
|
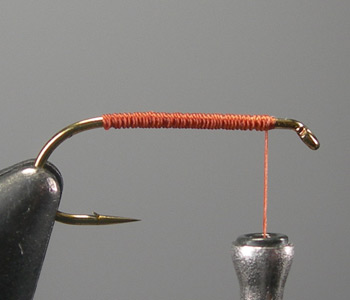 |
Step 1- Mount the hook in the vise and start your thread behind the hook eye and lay a thread base to the back of the hook shank and then back to just behind the eye.
|
|---|
 |
Step 2- When ever I use a portion of a strand of yarn or similar material I tie an overhand knot in the material leaving a tag end. It makes the yarn easier to split and helps eliminate waste. You will only need about 1/2 of a strand for the trail shuck.
|
|---|
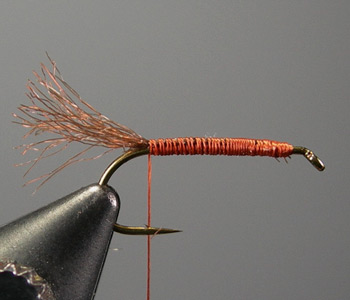 |
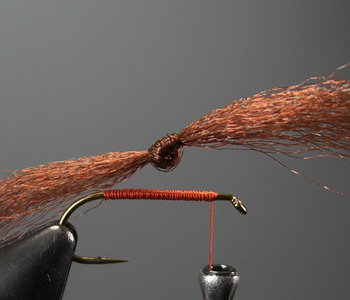
Step3- Tie in the Polly Tron yarn shuck behind the eye and wrap your thread down the hook shank and back a couple of times to make a smooth underbody. Tying the yarn in at the front of the fly helps to make the underbody more uniform than tying it in at the end of the shank.
|
|---|
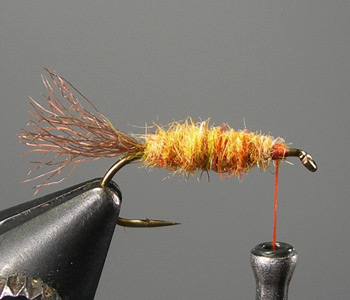 |
Step 4- Dub a thick round body with a slightly reverse taper towards the front of the fly.
|
|---|
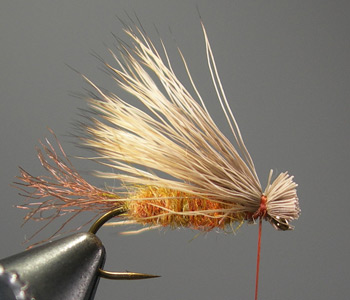 | Step 5- Select a small bunch of Elk hair and clip it as close to the hide as you can. Remove the under fur with a comb and place in a hair stacker to even the tips. I usually cut about half again as much hair as I think I will need to start. By the time I remove the under fur and the pieces of hair with broken tips it reduces the usable hair to about half the thickness of a pencil. Measure the hair against the hook shank. It should be about a hook length long and the tips should extend to just beyond the hook bend when it’s tied in. Make the first wrap a soft wrap and loosen your grip slightly each time as you make 2 or 3 more tight wraps while pushing the hair slightly down and around the shank. This should cause the hair to flair and cup the sides of the body of the fly slightly. This will help keep the fly from tipping on its side. |
|---|
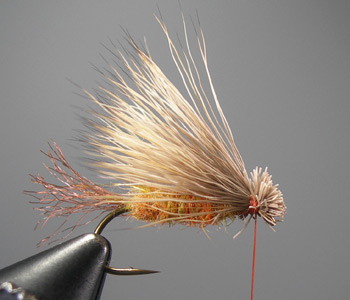 |
Step 6- Rather than tying down the wing tips in one place like the EHC I like to do it a little differently. I make 3 or 4 wraps thru the trimmed hair butts to form a head and to help secure the wing. Make your first wrap thru about 1/3 to 1/4 of the trimmed butts and each successive wrap thru another small bunch of the trimmed butts. Last wrap goes under the trimmed butts on the shank. I then whip finish the head and seal the trimmed butts with a couple drops of thin head cement.
|
|---|
 |
Finished Fly - Questions and comments are always welcome. You can contact me Steve Yates/ Flyman at syate6006@gmail.com.
|
|---|